Jeepskate's Joint
About Me
Links
Trail Run Pics
Tech Articles
Jeepskate:
Suspension
Steering
Drivetrain
Body/Interior
Jeepskate
II/XL:
Suspension
Steering
Drivetrain
Body/Interior
1 Last
7:
Suspension
Steering
Drivetrain
Body/Interior
![]()
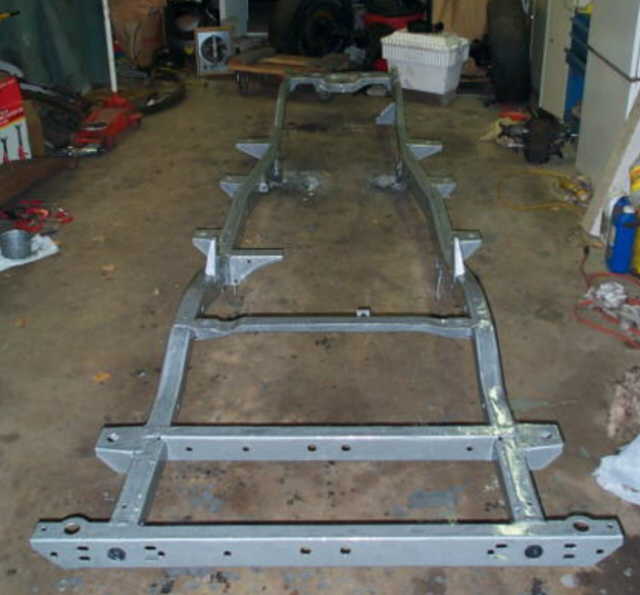
Frame Preparation
For some insane reason, I decided to start all over again and replace the original Jeepskate CJ-7 with a CJ-8 Scrambler which meant going back to square one with a bare frame again to build Jeepskate II/XL. I stripped the remains (the Jeep was pretty well roached when I got it for $400) down and discovered that just about all of the body mount brackets were badly rusted, as well as the rear crossmember and a small section of the rear driver side frame rail. At the time, Omix-Ada wasn't around and marketing new mounts. I bought a pair from J&L to check them out figuring that if I didn't like them it was no great loss of money and I could always re-use them as roll cage tie-ins. Well, I didn't like them. Around this time another Jeeper who was following my progress and worked in a machine shop contacted me in order to get dimensions for the brackets for his project and I asked him if he could run a set for me while he was at it...for a nominal fee he did and I ended up with a nice custom set of laser cut repro body mounts. I marked the frame where the mounts were, then proceeded to surgically remove them and the rear crossmember with a cut-off wheel. I also removed the front axle snubber bracket since it would serve no purpose, as well as the broken rear shock mounts and the spring hangers. Dean aka FarmJeep came by with his MIG welder and welded up the new mounts, rear crossmember, rear shock mounts (1" taller mounts made for me by Jeff Layton of Project Jeep Therapy fame) and some patches that I made for the frame rail and mounts on the gas tank crossmember in exchange for a Ramsey RE8000 that I had laying around that was in need of repair. I picked up some YJ spring hangers since they looked a little more obstacle friendly (and later saw that Sam Patton was running them on his bad-*ss trail rig) and somewhere along the way decided that I would run longer springs than stock. My buddy Karl came by with his stick welder and made short work of those. The rear ones were welded on in pretty much the stock location. The front ones required scabbing plates to the frame rails, then welding them on. The frame was now complete and ready for prep & paint. I again selected silver POR-15, but this time I went over the entire frame with an angle grinder to ensure a good bite. After prepping with Marine Clean & Metal Ready, I applied two coats of POR-15 followed by two coats of red hammered-finish Hammerite. I tried to skip using POR's Tie-Coat Primer, but unfortunately let the POR dry a little too much before top coating, so I've had some adhesion problems with the Hammerite as a result. After tearing the Scrambler back down in 2005, I decided to go ahead and install the custom rear frame plates that Matt made for me and I ordered up a set of front plates from MORE. My buddy Tim started the job and fixed a couple of small holes and replaced some of the broken weld nuts in the frame, then Anders finished it up for me. I'm planning to have it and a few other items hot dip galvanized to resist corrosion.
SOA Conversion w/Longer Springs
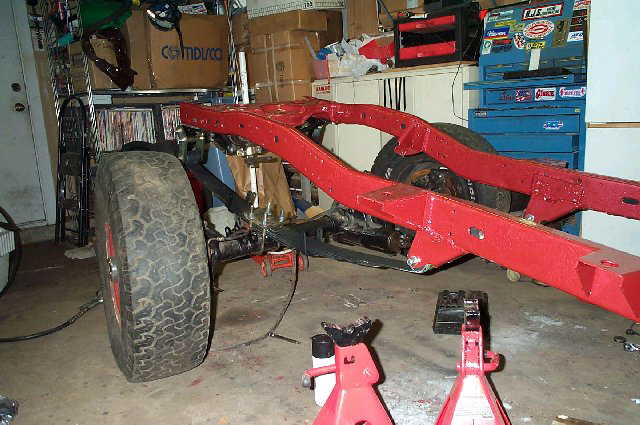
Since Jeepskate II/XL is simply a replacement for Jeepskate and I had kept the axles, another SOA was a no-brainer. Since this one would be pretty much trail use only, I decided to forgo the SRS this time and picked up some conversion front shackle hangers from JKS so I could stick with 2.5" wide springs up front. I also picked up a pair of M.O.R.E Boomerang shackles and flipped them to use as anti-kickback shackles up front. Out back I kept the M.O.R.E/Slickrock shackle hangers and M.O.R.E shackles, but drilled new holes in the frame and mounted them further back. At first I was going to use XJ packs up front (51") and J-truck packs out back (57"). I got the XJ packs after my buddy Karl had welded up the front spring hangers and as it turns out had gotten incorrect measurements on the eye-to-eye length and had forgotten to factor in that the JKS shackle hangers sit further forward. I made up a conglomeration of leaves using the XJ packs and some YJ packs which ended up being too short. Next I tried switching out the XJ mains with the mains from some S-truck packs (56")...they looked like they'd work, but once the weight of the vehicle was on them, they flattened out too much. I then added XJ 3" lift add-a-leaves but met with the same results. I've got some Comanche packs now that I'm going to cannibalize that I think will do the trick in supporting the arch that I need. After reading some info about Comanche spring packs (57"), I decided to ditch the J-truck packs in favor of them and located a set at the U-Pullit yard up the street. I disassembled all of the packs, cleaned the leaves, coated the friction surfaces with graphite paint, installed new Teflon pads, had Aurora Spring rivet new clamps on, put in new center pins, and installed new poly bushings. Additionally on the rear, I decided to borrow an idea from All Pro Off Road (mainly Toyota guys) and installed Johnny Joints from Currie in the main eyes of the rear springs (fixed end only) to improve flex a little (I didn't go as extreme as All Pro's setup) and relieve some of the spring twist. All of the bushings and bolts are greaseable. Fast forward to Summer 2005 and I fabbed up some boxes with nuts welded inside of them to fit into the front frame horns so I could move the front shackle hangers forward. Still not sure if I'm going to run with this as I discovered that early 70's to mid 80's Blazers use rear springs that are about 52" long. I'm trying to procure a set to try out as these might finally do the trick without relocating the hangers. I finally got a set of 52" Blazer springs and they appear to be just the ticket. I'll need to move the center pin 3"-4" forward to position the axle properly, but the geometry is now right along the lines of what I was after.
After removing them from Jeepskate, I initially had mounting flanges welded to the front dual-shock hoops. I later decided that the extra shocks would be an unnecessary expense and ordered up a M.O.R.E long-travel shock mount kit. It's basically a 3-piece bolt-in hoop that loops over the engine compartment. It uses the existing stock 'tall' shock mount mounting holes and requires some trimming of the inner fenders. I then picked up some new RS9000x's while they were on sale (buy 3 get 1 free...also got a set for '1 Last 7'). This is an update of the RS9000 which allows for more adjustability and is now available in an additional long-travel series. I ended up with a set from the long-travel series up front and from the regular series out back as well as an in-cab controller that I picked up cheap.
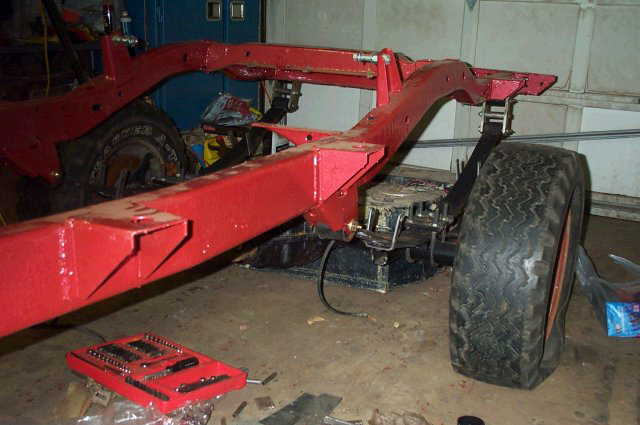
For spring wrap control, Anders and I decided to build a custom bam-bar setup combined with a bolt-on over the top axle truss. I had originally planned to use Missouri Off-Road Outfitters truss, but they went out of business before we got to this point, so armed with some axle tube clamps off Ebay, Anders' tubing bender, and pictures of M.O.O's truss, we went to work. The truss also serves as the axle connection point for the bam-bar and we added an additional crossmember to the frame for the upper/forward attachment point. The main portion of the bar uses standard poly YJ spring bushings, but the axle truss attachment uses a chunk of Delrin that Anders chucked in the lathe to make bushings with less 'give'.
A Touch of Grey...
The restored frame prepped &
coated with POR-15.
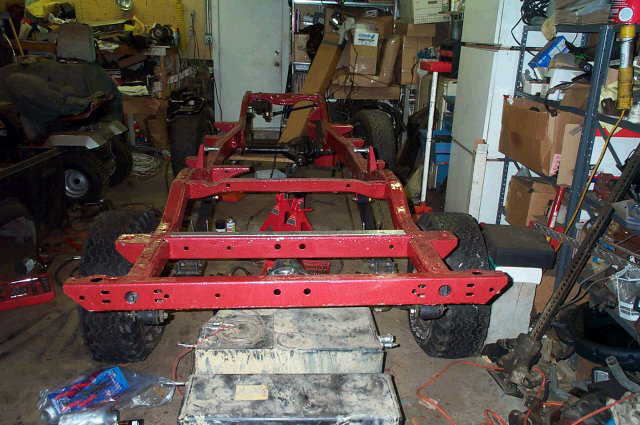
Getting Red-dy...
Top-coated with red Hammerite and with the
suspension in place.
Front Suspension Version 1...
First fitting of the modified XJ
spring packs w/relocated YJ hangers, JKS shackle mounts, & M.O.R.E Boomerang
shackles.
Rear Suspension...
Modified MJ spring packs w/YJ hangers,
MORE shackle mounts & shackles, & Johnny Joints.
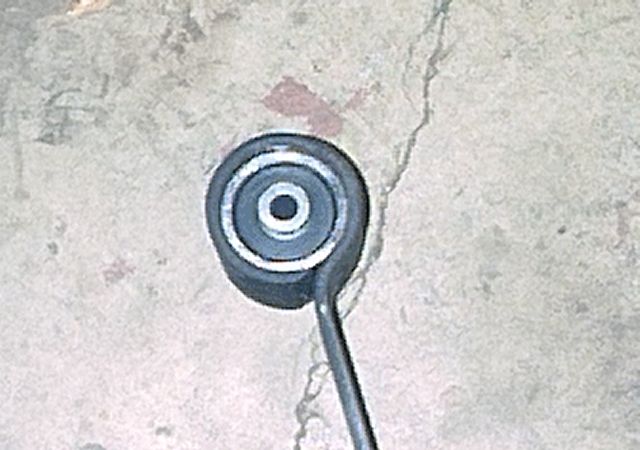
Orbital...
Johnny Joint installed in the spring
eye.
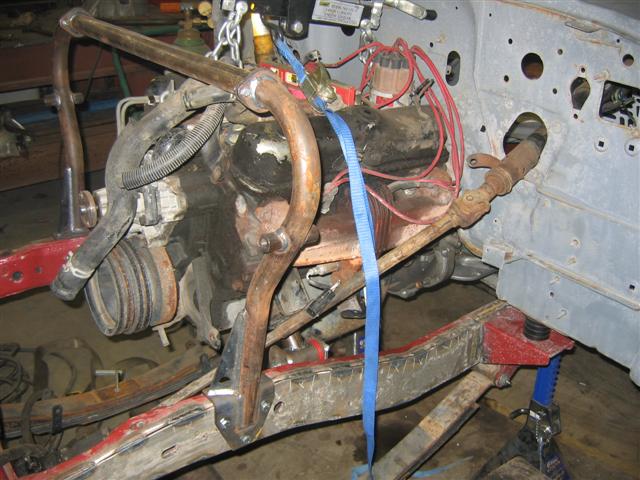
Caged...
MORE shock cage installed.
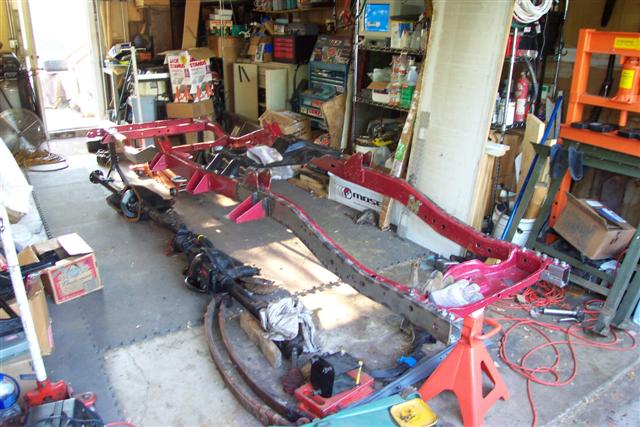
Plated...
Frame beefed up with frame plates.
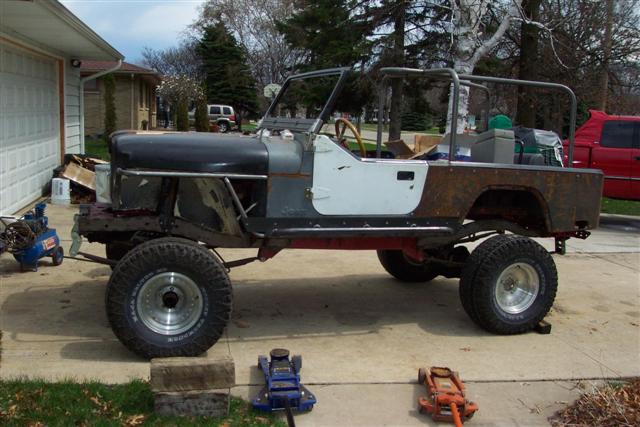
On all fours...
Assembled with the Blazer front
springs and lightly reinforced rear springs.

Viva la Bam...
Bam-bar mounts and the 'tower' portion
of the bar.