Jeepskate's Joint
About Me
Links
Trail Run Pics
Tech Articles
Jeepskate:
Suspension
Steering
Drivetrain
Body/Interior
Jeepskate
II/XL:
Suspension
Steering
Drivetrain
Body/Interior
1 Last
7:
Suspension
Steering
Drivetrain
Body/Interior
![]()
YJ Tub & Fender Swap w/1" Body Lift
The original intention was to install a fiberglass body tub. However, my funds would not allow me to do this and still be able to pay for the work that was done at ChicagoLand 4WD Center. So I did the next best thing and picked up a used '87 Wrangler tub. This is one of those modifications that several of the magazine technical writers will tell you can't be done...DON'T YOU BELIEVE IT! I went into a bit more detail on mine than is really necessary, but I wanted mine to be absolutely 100% dead-on. Why do this, you may ask? It's less expensive than fiberglass, better quality than the Steel Horse/Acme replacement steel bodies as well as less expensive than them, and the YJ tubs are galvanized. I may still eventually go to a fiberglass body when it's time to re-do Jeepskate again, but that'll depend on the condition that this tub is in at that point. I located a lightly damaged tub at Arnold's Truck Parts in Eldridge, Iowa and drove out there one Saturday with my buddy Randy in his Dodge Ram (the same guy I bought the wheels and 35's from) with another friend's trailer in tow and picked it up.
There's really only two modifications that *have* to
be made:
1) The holes on either end of the rear crossmember have to be enlarged with a die grinder
so that the mounting bolts can line up with the threaded plates in the body mounts. They
need to be opened up approximately 1.5" toward the outside to allow for the body
mount bushings.
2) The mounts just forward of the rear tires don't line up. There's 3 schools of thought
on this: Don't worry about it, there's 9 other mounts; Slide a nut into the channel in the
bottom of the tub that lines up with the mount and bolt into that; Relocate the mount on
the frame to match up with the body...this is the route I chose. The mounts were cut loose from the frame
and the residue was ground down flush with the frame. Then the mounts were bolted to the
body to position them correctly. Finally, two pieces of heavy gauge u-channel of a
suitable width were cut to fill the 3/4" gap between each mount and the frame rail.
These were welded to the frame, and the mounts were in turn welded to them. U-Channel was
used to lessen the risk of trapping moisture against the frame...water, etc. can drain
through the channel.
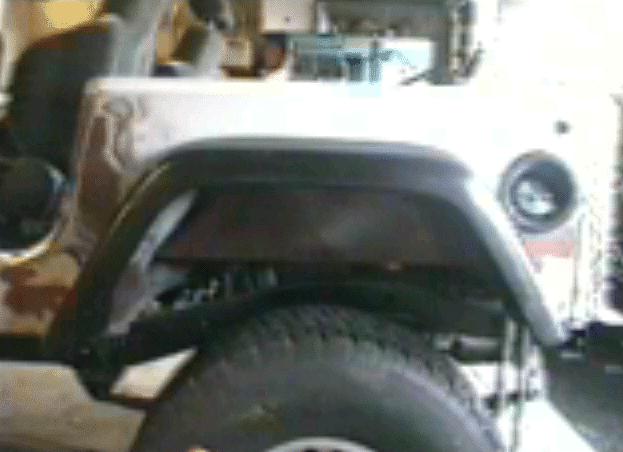
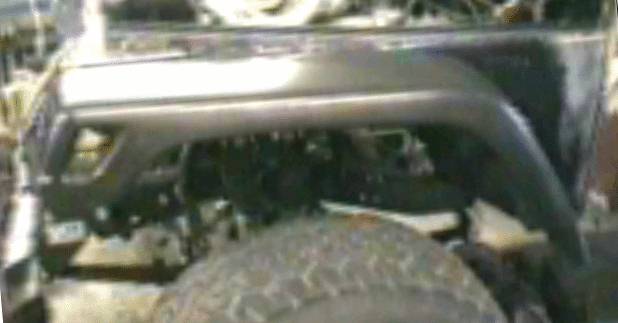
The fender conversion is a little bit tricky and requires a bit of bodywork. This is another item that many of the magazine guys will tell you can't be done, but it can and has been done. I measured it all up before I bought all of the parts, and I have also seen at least two CJ-7's in magazines with this setup. The first inclination is to just jump in and bolt everything together in the "stock" locations. But, you will end up with a healthy "under-bite". The YJ nose is about an inch longer than the CJ nose. So, you must move the CJ grill backward so that the second row of holes in the YJ fenders line up with the threaded inserts in the grill shell. You will of course require some bodywork to fill-in the unused holes that are left sticking out past the grill. You'll also need to drill a couple of holes in the fender to match with the threaded inserts in the grill shell, fill in the YJ hood catch holes, drill one new hole in each fender to match up with the catch locations on the CJ hood, drill new holes for the hood cushion pads, and grind a bit of the reinforcement lip off of each fender in order to get a flush fit against the grill. Alternately, you can cut and re-bend the rear edge of the fenders where they mount to the body, thereby shortening them back to CJ length. This would give you more tire clearance at the back edge of the fender opening.
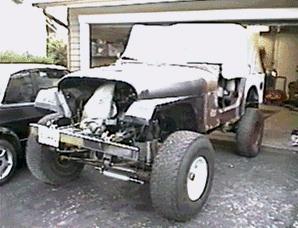
I wanted some extra clearance for my 35's without doing anything radical. I didn't want to risk my ride quality or flex with lift springs or add-a-leaves, so that left body lifts. It's generally agreed upon that 3" and even 2" body lifts put a strain on the body mounts, so I went in search of a 1" body lift (I don't like the risk of hockey pucks shattering). M.O.R.E and JB Conversions (and now a few others) offer them and due to pricing and the fact that I had other M.O.R.E products that I was very satisfied with, they again got the call. The M.O.R.E kit comes in two different flavors: The Kit which is just the 1" aluminum spacers and longer bolts, and The System which adds a full set of polyurethane bushings. I purchased the full system. Installation was pretty simple. I did the grill first. I had to extract a broken bolt out of the mount with WD-40 and vice grips. Then I slid the body up onto the frame (amazing what you can do by yourself when you have to) and started on the passenger side with the mount just behind the firewall. I put anti-seize compound on the bolt threads and threaded them in loosely so that I would still be able to lift the body up enough to line up the bolts with the nut plates in the body...my Hi-Lift jack was quite useful for lifting the body in a few spots in order to slip the lift spacer into place. I was missing one nut plate on the driver side just behind the firewall, so I substituted a large spacer I had salvaged from an IBM mainframe and a 3/4" nut...luckily this area is easily accessible (which is probably why the plate was missing in the first place). I used a YJ kit which has larger diameter bushings in the 6 spots along the sides under the rocker panels. This allowed me to grind the mounts on the frame out a bit to remove metal that had been damaged by corrosion.
Since I'm using
a YJ dash and windshield frame, I didn't really need to address any other issues beyond
the fuel filler and tailgate. However, I will cover them for the benefit of others.
Fuel filler: Flip your gas tank around and get longer filler hoses
or patch or cover the old hole and make a new one on the passenger side. I
used Get Serious! partial-wrap diamond plate corners to cover everything up
and went with a TJ gas filler on the driver side rear quarter panel.
Tailgate: Use a YJ
tailgate or swap on your CJ tailgate. I retro-fitted the original CJ
tailgate on mine.
Dash: Pretty much a direct bolt-in, a couple of holes may not line
up.
Defroster: You'll have to cut the cowl to allow it to work with
your CJ defroster vent. Note that if you use a YJ windshield frame with a CJ dash and
defroster setup, you'll need to cut the windshield frame and fit it with
defroster vents
as well.
The rear roll bars are completely interchangeable, so that's a non-issue, and you
may need to do some minor drilling and cutting to mount the front seatbelt retractors
depending upon the year...I used belts from a '93 and had to drill a couple of holes in
the sidewalls and cut slots across them for the retractor retaining brackets, the existing
bolt holes were fine.
CJ Tailgate Retro-fit
There are certain visual elements that I think are part of what makes a Jeep a Jeep. One such thing is the "Jeep" that is stamped into each side of the body tub...the other is the "Jeep" that is stamped into the tailgate. The Wrangler tailgate just doesn't do it for me, so I decided to retrofit the original '79 tailgate (one of the few original pieces left of Jeepskate) to the '87 Wrangler tub. First, the Wrangler tailgate and associated bracketry must be removed. Next, the CJ-7 tailgate with hinges bolted to it (thanks again to Peter at Gemini Sales for spending 3 months hunting those hinges down for me!) is fitted into place and the area where the holes will have to be drilled to bolt the hinges onto the body is center punched (don't want the drill bit to "walk"). Then the holes are drilled. I used a 1/2" drill bit. Next, locate the drain holes in the bottom edge of the tub that are closest to where the mounting holes were drilled and cut/grind them open for access. I used a grinder and air cut-off tool to make large enough slots to slide nut plates through. Place nut plates inside the body channel through the openings that were just made, and bolt the hinges to them. I used OEM CJ-7 plates that were salvaged from a junk body (thanks Rick Boiros!). In order to simulate the setup in a CJ tub without the need for welding, I left some of the CJ sheet metal in place so that the plates are still "boxed" in and able to float. They are sealed to the YJ tub with epoxy. Working on the inside now, brackets must be attached to the wheelhouses to attach the tailgate cables and provide a place for the tailgate to latch. Again, I used parts salvaged from a junk CJ-7 tub (thanks again, Rick!). 4WD Hardware now makes brackets for this purpose for their fiberglass tubs, but I'd imagine they could be used for this purpose as well. They're simply placed in position with the tailgate closed, and tack-welded into place.
TJ Gas Filler
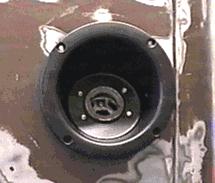
This mod became necessary after the installation of military tail-lights which basically used up all of the available space on the rear of the body. I ordered the TJ "surround" (I think the parts catalog refers to it as an adapter) from the local dealer for $8. I ended up flipping the gas tank back around so that the filler is on the driver side in order to make it easier to mount the filler and route the hoses. I wanted to mount the filler as high up and far back as I could. I measured up 14" inside the rear wheel well from the bottom edge of the tub, to the bottom edge of the wheelhouse flange and transferred that measurement to the outside of the tub as the top edge of my cut-out. Then I measured the flange on the surround (approx 3/4") and came out about 1" from the seam between the side panel and corner and used that as the rear edge of my cut-out. I used an old template I had laying around for cutting out holes for 6.5" speakers (it was the perfect size for this job) to mark my hole and cut it out with a jig saw. Note that I ended up cutting into the wheelhouse brace a little bit. After fitting everything in, I think this could have been accomplished by denting the brace with a BFH to gain the needed clearance. The filler neck from a CJ or YJ (I used a YJ neck) bolts directly to the TJ housing using 4 of the 6 mounting holes. Just have to drill 5 holes into the body (4 for screws, 1 for a "locator pin" that's molded into the housing) and it's a done deal. Somebody must really like me ;-) This was one of those "wing and a prayer" mods because I really couldn't do much research on it. The housing/filler combo, rear outrigger, and tail-light bucket all just barely clear each other. After looking locally for fuel filler hoses and not being able to find anything suitable, I ordered up some Aeroquip braided stainless steel hoses from Summit Racing. They were only available in AN sizes so I used a conversion chart to select the correct hoses. I was able to install the filler vent hose without much incident, but have been having a heck of a time with the filler hose...I think the chart left a little too much room for fudge factor. Hopefully by trimming back some of the braiding I can stretch the hose enough to fit...this stuff ain't cheap.
TJ Fender Flares
A few people have already done this, but I haven't seen it documented yet (this has since changed) so here goes. The most popular reason for doing this is to be able to trim away some extra sheet metal for more tire clearance while still being able to cover up the work with a nice finished flare. Proper placement of the flares is probably most critical on the rear. This is due to the differences between the wheel housings from CJ/YJ to TJ. I further complicated things by having previously installed a TJ gas filler in my driver side quarter panel. Simply due to personal preference (and the fact that I got the rear flares first), I started with the rear. When I tackle a project that can consume time and patience, I like to start with the more difficult portion first. What makes the placement on the rear tricky is the size and location of the wheelhouses and step brace. For optimal trimming, the rear of the flare must be position rearward of the seam between the quarter panel and the corner of the Jeep. This leaves room to trim up front without encroaching on the seam between the quarter panel and the wheelhouse. Because of my use of a TJ fuel filler, this placement is not an option for me. I must choose between cutting about an inch off the bottom of each flare and mounting them close to the stock CJ/YJ position (still allows for some trimming), putting them on where they fit best without interference from the filler thereby leaving some uncut sheet metal (afraid this might look kinda dorky), or seeing if I can cut the mounting surface of the flares at the corners and tweak them a bit for a smaller opening (I just thought of this one as I was typing this page).
I picked up a new set of TJ side markers from Naperville Jeep and had to modify my YJ side marker light sockets to fit. Where the CJ and YJ use a connector with 4 mounting tabs, the TJ uses one with 2 tabs. So, I grabbed my trusty Dremel tool with a cut-off wheel and removed two opposing tabs from each of my connectors and they fit the TJ side markers perfectly and securely. After a bunch of drama caused by the demise of ChicagoLand 4WD Center, Mudpig is selling his TJ so I won't be getting his front flares (he bought a CJ and I'll probably give the rear flares back to him for his build-up). I came across a killer deal on a set of white TJ Sahara flares which I promptly snapped up. These are a little bit wider than the standard flares.
I finally broke out the jig saw and a fresh pack of metal cutting blades and went to work. The first order of business was optimal placement of the driver side rear flare. I settled with the rear edge of the flare being just a hair over 1" forward of the corner seam. I clamped the flare in place and dabbed the tips of the "locator pins" on the flares with a magic marker and pressed them up against the body. Then I drilled the holes with a 3/8" drill bit and put the flare back in position. With the flare in position, I marked my cutting line with the magic marker. I removed the flare and cut on the outside of my line starting at the rear until I ran into the forward slope of the wheelhouse. Then I went to the front edge and trimmed just a touch back from the edge of the wheel opening, basically following the contours of the wheelhouse and bracing until I met up with my previous cut. I test fit the flare again and marked where I needed to trim the lip off of the back side of it where it would need to rest against the body, and trimmed it with a linoleum knife. I test fit the flare a few more times and tweaked the opening a bit more with the jig saw and an angle grinder. Then I transferred my measurements over to the passenger side and repeated the process.
A couple of days later, I stumbled across a deal on a used set of 7" wide Tera Flares. I promptly settled that deal and had a buyer lined up for the Sahara flares within a day. During the transition time, I installed my Borla header and re-installed the driver side front fender. Once the Tera Flares arrived, I modified the lip on the rear flares the same way I had on the Sahara flares and clamped them in place to mark & drill the mounting holes. I re-used the YJ mounting hardware to secure them to the body. Then I made my way up front. Once again I positioned the flare and clamped it in place and fine-tuned the fit as best as I could (the lip makes it a bit difficult). On first glance it didn't seem like I'd need to do much cutting, but once I actually got the flare in place and started trimming the sheet metal, it became clear that there would be quite a bit of cutting to do. Basically, you want the top of the flare to be flush with the top of the fender so that the front edges match up as closely as possible. It's not perfect, but it's tolerable and the bottom edge of the flare can always be shaved down a bit. The lip has to be trimmed off of the front edge of the flare and the flare pulled and secured with a couple of mounting bolts in order to match up with the slope of the front of the YJ fender. Finally got around to mounting the front driver side flare. Learned my lesson from the passenger side and started off with the bottom edge lined up with the bottom edge of the front of the fender. I got it about as close to perfect as I think is possible, then went back and re-did the passenger side and got it flush in front as well.
'92 - '95 YJ Roll Bar Swap
This swap is becoming more and more common as some of us Jeepers get older and start families. It's a fairly simple "bolt-in" retro-fit that gives inexpensive added protection to rear seat passengers. I used a roll bar ("sports bar") salvaged from a wrecked '94 Wrangler that was laying in the salvage yard when I purchased my body tub. I told the counter guy that I wanted it instead of the one that was in the '87 tub, so I got it for "free" along with the '87 bar since they didn't feel like pulling the old one off. The rear feet bolt right into the two existing nut plates on the rear wheelhouses. I used rear seatbelts from a '93 Wrangler. The front feet are a little tricky. Only three holes line up...the two in the step brace and one in the floor, and it takes a little effort to get all three bolts in without enlarging the one in the floor. If you don't feel secure with 3 bolts instead of 4, you can re-drill the hole for the fourth (the one closest to the seatbelt). Again I used seatbelts from a '93 Wrangler...this required a little work here as well since the older seatbelts are slightly different. The older ones use two "locator" nubs and a bolt, the newer ones utilize that same bolt hole at the bottom, but the top of the bracket actually "locks" inside the inner body wall. I had to mark the location of the catch and then drill a hole and cut a horizontal slot at the top of it with a jig saw. The catch then slips into the slot and you move the bracket to the side and down to lock it in and then bolt it down.
In order to make this setup actually provide more realistic rollover protection, I decided to go with a frame tie-in kit from Kentrol. Then while surfing the net one day, I stumbled across J&L 4-Wheel Drive Center. They offer a unique telescoping rear outrigger setup which gives you the strength and insurance of a frame tie-in without rigidly connecting the roll bar and frame together which would limit body flex. With the outriggers in place, the body can still flex and move independent of the frame. Someone with the proper tools and ability at home could easily fab something like this up and probably get a better fit. This is not to take anything away from J&L...this is just one of those items that is best built on the vehicle rather than pre-fabbed in order to get the angles and mounting holes correct. I did have to do some minor modifications. I had to trim the mounting plates on the upper halves and drill new mounting holes in them for a better fit and sturdier support in the event of a rollover. I also drilled an additional mounting hole in each mounting bracket on the lower halves for improved support. I plan to pick up a bolt-in front cage kit from J&L and install it. I'm trying to decide between conventional floor mounting and mounting it to plates on the dash in order to avoid interference with items like the window cranks and emergency brake.
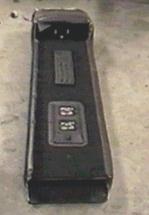
Military Tail-lights
This is just something that I did to be different...it certainly wasn't an economical undertaking. These are the tail-lights that became somewhat popular when the Hum-Vee became a big hit. They are found on military Hummers and many other military trucks. I purchased them "new" from Surplus Enterprizes (616-651-3707) after browsing through some of the Hummer web pages. The lights were $50 each and the buckets were $22.50 each and included rivets for securing them to the vehicle. Because they are military issue, the bulbs are all 24 volt and must be replace with 12 volt bulbs. The brake/turn bulb is a #1156 which is the same as a backup bulb for a Jeep. The other three bulbs get replaced with #67. They have a normal parking/brake/turn setup and a "blackout" parking/brake setup (I'll probably wire these up as well just for the heck of it). Separate backup and side marker lights and rear reflectors must be installed as well to be street legal. These units are large and beefy...they're water-tight and the receptacles are mounted on shock-absorbing spring-loaded brackets. If you get nervous cutting into your sheet-metal, this is NOT the mod for you ;-)
First I picked a mounting location for the buckets and drew a straight horizontal line from the tailgate opening to line up the top 2 mounting holes in each bucket and traced the outline of the bucket onto the body. Then I traced the outline of the bucket onto a piece of gift-box cardboard, and traced the outline of a tail-light housing and cut it out leaving me with a workable template. Next, I taped my template in position within the outline on the body, and traced my actual cut-out. Note: the first one ended up being too small and I spent about an hour with grinders tweaking it to the right size, then traced it back onto my template and re-cut the template before doing the second opening. I broke out the jig-saw and a fine metal cutting blade and went to work. Because of my positioning, I also had to cut into the top panel of the wheel housing. You can position the lights further down, but if doesn't leave much room for body-mounted back-up lights. I installed rear roll bar tie-ins from J&L to beef things up even beyond what they were before the "surgery". Some fine-tuning for fit was done with a die-grinder, and the buckets were pushed into place. The lights then pop into the buckets (there's a hole in the bottom for the wires to exit) and are secured from the backside with two 3/8 coarse thread bolts.
No, I didn't forget about the wiring ;-) There's 5 wires running out of the light labeled either A-E or 2-6 (mine are 2-6)...one of them is a ground, the others supply power to the bulbs.
From a Hummer page, I gathered the following:
A = Ground, B = Blackout Brake, C = Blackout Parking, D = Turn Signal/Brake, E = Parking
From my checks with a battery & two "jumper" wires:
2 = Parking, 3 = Turn Signal/Brake, 4 = Blackout Brake, 5 = Blackout Parking, 6 = Ground
I bought some GM weather pack connectors from Centech (they were ridiculously expensive from the auto parts store), a set of backup lights from Napa which I'll replace as soon as I find some flush mounts that are small enough (just noticed some cool rectangular ones with reflector surrounds on the little "vans" that the mail carriers drive), and a set of red side markers for pre-'81 CJ's from 4WD Hardware. Also, due to space constraints, I installed a TJ fuel filler on the side which was detailed above.
I found my new backup lights and ordered them from a trucking supply company. They're made by Truck-Lite, and look similar to the ones in the back of the little vans that the mail carriers drive when delivering mail. They're rectangular red reflectors with a square backup light in the middle of them and are flush mounts. I have just enough space left below the Hummer tail-lights to install them. I removed the diamond plate corners and made a template for the cut-out by tracing around a light onto a piece of thin cardboard and checking it against the specs from Truck-Lite's web page. I centered them in relation to the tail-lights and left enough space between the top edge and the bottom of the tail-light buckets for the mounting gasket. After checking that things were pretty level, I went to work with an air cut-off wheel and jig-saw...I cleaned up with a die grinder and removed a bit of extra material to give me some room to play with to level things out. Then I test fit the gasket and popped in a light, removed them, put a corner back in place, and traced the cut-out onto the back of the corner and cut it out with a jig-saw.
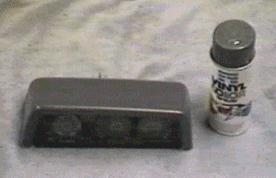
Durabak Bed Liner Application
Manufactured by Cote-L, Durabak is one of a handful of do-it-yourself bed liners on the market. It's made from some sort of paint-like substance and ground-up recycled tires. I couldn't bring myself to tow Jeepskate over to a Rhino Liner dealer and pay upwards of $800 to have it lined after only paying $250 for the body, so I figured for $100 a gallon I'd give Durabak a try. I know that it can be Rhino Lined for less than that, but that's what the dealer around here charges for it. If I lived somewhere with a dealer who charged more like $300-400, I probably would've gone that route...I hate prep work. I ordered a gallon and an extra quart (just in case) of black, but several colors are optionally available for a few extra dollars. The only additional purchases were Xylene for final prep, thinning, and clean-up and a couple of brushes for getting into areas where the supplied roller can't reach or isn't effective. Alternately, Durabak can be thinned and sprayed on with an undercoating gun. Basically, just follow the instructions and rough up the surface (I used 180 grit sandpaper), vacuum up any loose residue, wipe down with Xylene, and you're ready to go. I started with the rear wheelhouses and cargo area, then took a break, did the tailgate, then prepped the passenger compartment, applied the 2nd coat to the rear, and then the 1st coat to the front. Once the front was dry, I applied a 2nd coat there. I worked mostly with a cheap 2" paint brush that I saved after refinishing my deck a couple of summers ago, and was able to achieve a nice, highly textured finish. What I found worked best was to pour some of the product into a separate container (which you're supposed to do anyway) and let it sit in the air for 5 - 10 minutes so that it starts to cure. This makes it somewhat gloppy, and it's easier to lay it on without it thinning out on the surface as you're applying it. Be sure to wear a mask and work in a well-ventilated area...preferably outdoors. The fumes from this stuff are *strong*. I was working outside on a day without much of a breeze and nearly passed out while doing the second coat up front...my eyes closed for a moment, head spun, and I felt myself starting to buckle and go down. I caught myself and promptly took a break.
Interior
Pretty much a no-brainer. As part of the $2k deal I got on '95 YJ parts I got an almost complete interior. I got both front reclining bucket seats with pedestals and sliders, the folding back seat with floor brackets (my tub still had the wheelhouse brackets in it), door strikers, roll bar padding and the front extensions, complete dash, sound bar with dome light (which I traded for an older one without the dome light since I have an overhead center console), carpeting, and center console (which I sold and will replace with a Tuffy or custom made unit). To this I added a tilt-steering column from an '88 topped off with the steering wheel from the '95, front and rear seatbelts from a '93 that I traded some PC/Mac memory for, rear roll bar from a '94 that I picked up when I bought my body, tilt gauge from a Toyota SR-5 pickup (saw this in a CJ in 4WD&SUV several years ago), Olympic "Big Grip" windshield knobs, Thor Soundwedge rear speaker enclosures (original ones left over from Alter Ego), and a Steel Horse overhead center console (no longer in production (and the company has now gone out of business), left over from Alter Ego).
I decided to swap the '95 bucket seats into the '1 Last 7' so that I'd have more comfortable seating in there, and I picked up a nice set of bucket seats from a late '80's Honda Prelude (the driver seat has an adjustable lumbar support...very good for my trashed back) at the local u-pull-it yard for $60. They're darn near mint and I spied another set in an Accord Coupe as I was walking back to pick up the second seat that I'll probably go back and get for spares. Just have to do a little creative adapting to mount them to the Jeep brackets. I ended up utilizing the Honda seat sliders and cutting out pieces of the original (trashed) rear crossmember to make mounting brackets. I also bought a custom "Urban Camo" center console from Westley Karcher (which has since been stolen out of '1 Last 7'). Depending on whether or not we have another child (we aren't), I may put a single bucket in the back rather than a full-width back seat and mount the spare next to the seat with some custom bracketry.
During the final stages of the build-up, I'll be adding a J&L bolt-in front cage kit, stereo, power windows (because of interference between the cage and the window cranks), CB, fire extinguisher(s), and Brit-Fab kick panels and side panels to cover up some of the wiring along the sides.
I decided to take the inexpensive plunge while everything was apart and do a Blazer blower motor upgrade. I picked one up from Pep Boys for $22.50, looked over the instructions at off-road.com to refresh my memory. and went to work. The first order of business was to enlarge the hole in the firewall, which I did with an angle grinder and die grinder, and test fit the motor for clearance (it ends up very close to the bottom of the battery tray). Then I removed the original motor from the heater housing and stripped it of the rear gasket and the "squirrel cage" and attached them to the new motor and installed the motor in the housing.
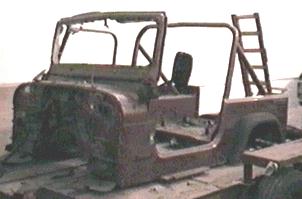
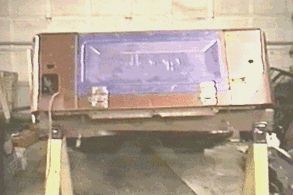
Back From The Hunt...
Back at the shop after transferring to
another trailer.
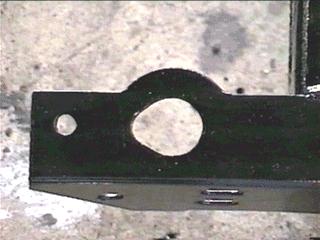
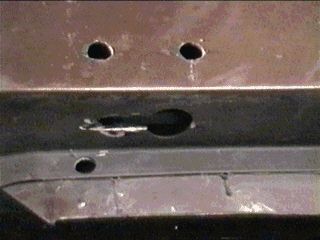
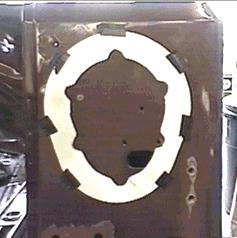
Ovaled Out...
Initial grind on the rear
crossmember...wasn't quite enough & I had to grind a little more at install.
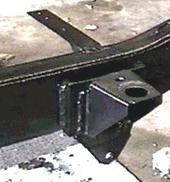
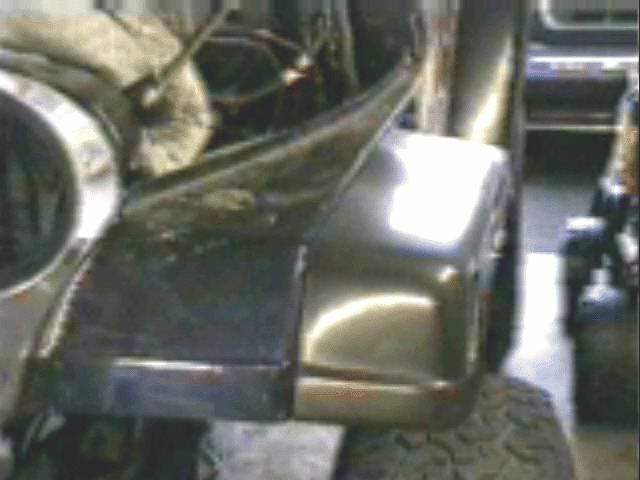
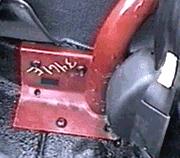
Moved Mount...
Relocated body mount with u-channel spacer.
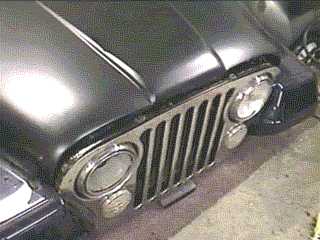
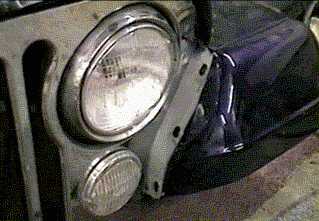
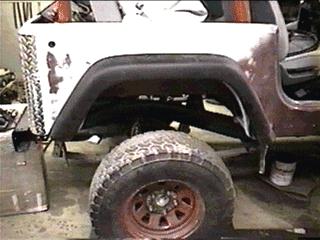
Under bite...
Can't use the standard bolt holes.
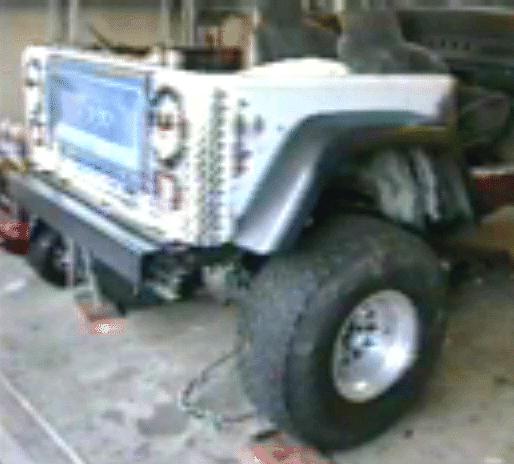
One Step Back...
Corrected mounting.

Trim Here...
Reinforcement "lip"
on fender that needs to
be trimmed for a flush fit.
In Position...
CJ tailgate and hinges positioned for
drilling.
A Few Extra Holes...
Holes for hinge screws and slot for nut
plates.
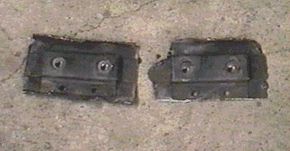
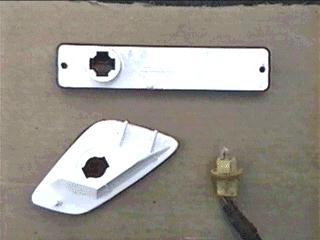
Nut Plates...
Tailgate nut plates salvaged from a CJ tub.
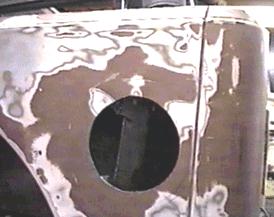
Circular Sawing...
The new hole after a little jig-saw saw.
Fill 'Er Up...
First fitting of the TJ filler to mark the
mounting holes.
Marked for Cutting...
The cut line...locator holes are just
barely visible.
The Cut...
Wheel well after some judicious trimming.
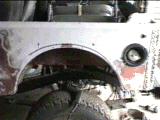
Flared Up...
TeraFlare mounted & ready for action.
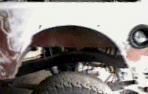
Optimal?...
Unmodified sport flare in best compromise
spot.
Final...
Positioned about 1" in front of the
seam.
2nd time around...
Got it flush with the front edge.
Flushed...
Front TeraFlare flush with YJ fender.
CJ/YJ to TJ......
Side markers with a modified connector.

Rear Foot...
A perfect fit...everything lines up.
Front Foot...
3 out of 4 ain't bad.

Flexible Support...
The lowers fit inside the uppers allowing them to
telescope, yet in a roll, the affected side would compress and form a solid tie-in.
Between The Lines...
Template positioned for tracing.
Big
Jagged Hole...
The first hole cut out.
Encroachment...
Bucket sitting in the wheelhouse cut-out.
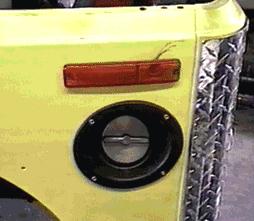
CJ? TJ? ...
CJ side marker & TJ fuel filler.
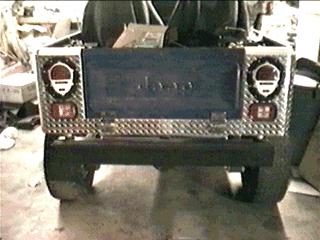
Going Postal...
The new flush mount backup lights.

No Skid Tailgate...
Durabak applied to the tailgate.
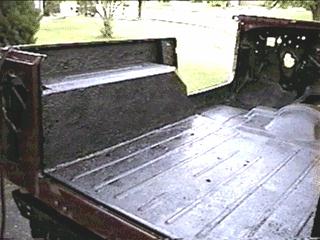
3/4 Rear View...
No-skid floors, wheelhouse, side walls
& firewall.
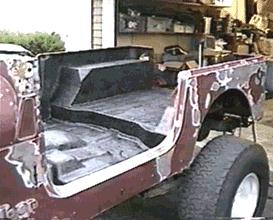
From Another Angle...
3/4 shot from the front driver side.
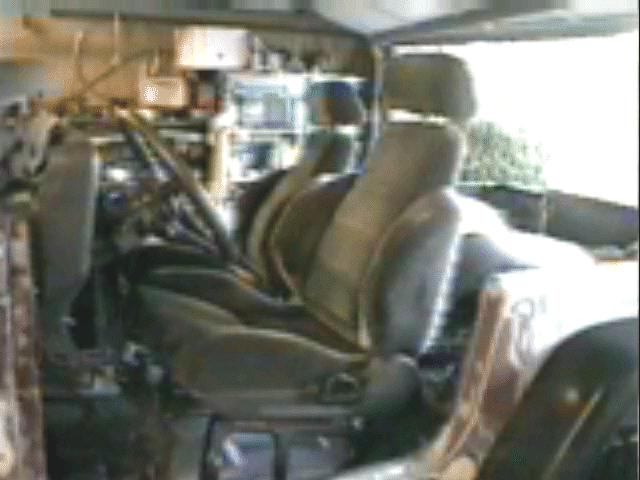
Pilot & Co-Pilot...
Nice comfy seats from a late 80's Honda
Prelude.
Tilted Toyota...
Re-colored from blue to dark grey to match.
Over My Head...
Steel Horse overhead center console with
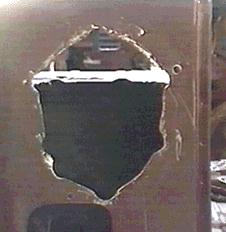
DIY upholstery job.

Holey Firewall...
Enlarged blower motor hole.
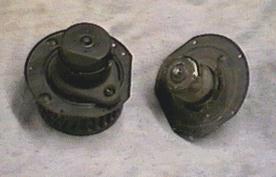
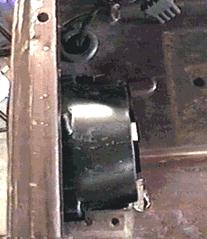
Blowhard...
Blazer motor with squirrel cage (left),
stock motor (right).
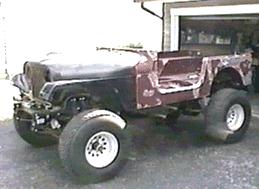
Voila...
Almost looks ready to drive.